Add individual parcels to a group to analyze multiple parcels together
The parcel group feature allows you to conveniently analyze multiple parcels together, gaining valuable insights in the process.
To begin, identify the relevant APNs (Assessor's Parcel Numbers) that you want to include in your analysis. Once you have determined the APNs, follow these simple steps:
- Select the "Search" tab on the left sidebar and then the "Parcels" sub-tab
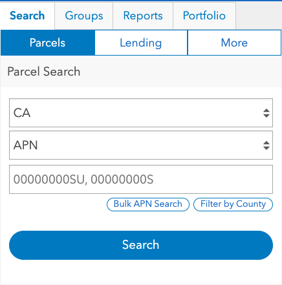
- Find the parcels you are looking for by conducting a Parcel Search. You can either search for parcels individually or perform a bulk APN search.
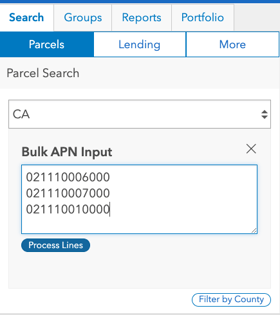
- Once the search results appear there are several ways to add a parcel to a group.
- Add all parcels displayed in the search results by selecting "Add All"
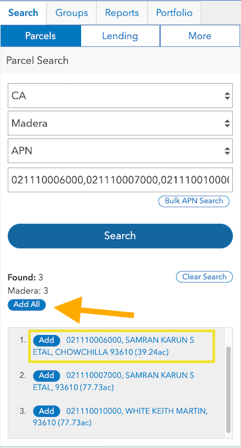
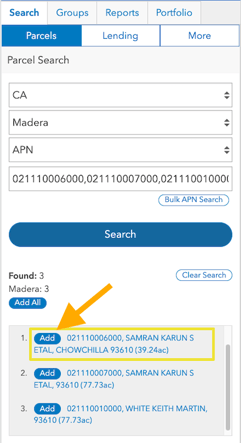
- Add parcels individually from the search results by selecting "Add" beside of the parcel information in the search results
- Click on a parcel on the map (the righthand side bar will appear). Select "Add" from the Actions section in the right hand sidebar
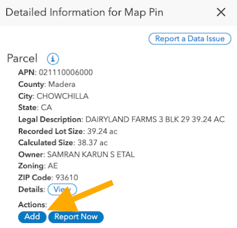
- Add all parcels displayed in the search results by selecting "Add All"
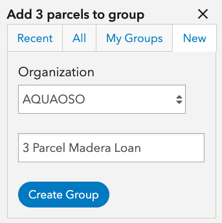
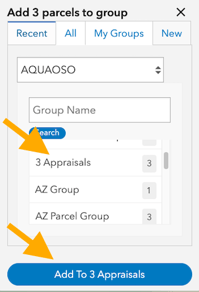
- Once the "Add" or "Add All" buttons are selected, a window will pop up with the option to add the parcels to an existing group, or create a new group.
- To create a new group, select the "New" tab and enter in a parcel group name. Next, click on "Create Group".
- To add to an existing group, find the group in the Recent or My Group tabs, and select "Add to [Group Name]"
- To create a new group, select the "New" tab and enter in a parcel group name. Next, click on "Create Group".
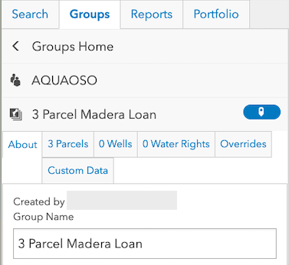
- Your parcel group will appear on the left hand sidebar under the Groups tab
If you are adding parcels one by one to a group, you will need to repeat steps 3b or 3c until all parcels have been added to your parcel group.
